DIY vs. Professional Radon Air System Installation in RI
Radon gas is a dangerous carcinogen that can be found in homes across the country, including in Rhode Island. Exposure to radon gas for extended periods of time can lead to serious health problems, including lung cancer. That’s why it’s essential to have a radon air system installed in your home. If you live in Rhode Island and want to protect your family’s health, you should consider radon mitigation Rhode Island. But should you do it yourself or hire a professional? In this blog post, we’ll compare DIY installation versus hiring a professional for your radon air system installation needs. We’ll take you through the steps and equipment required for DIY installation, the challenges you may encounter along the way, as well as the benefits of hiring a professional installer. We’ll also cover factors that determine the cost of professional installation and assess the costs associated with both options so that you can make an informed decision on what’s best for you and your family’s health.

Understanding Radon: A Brief Overview
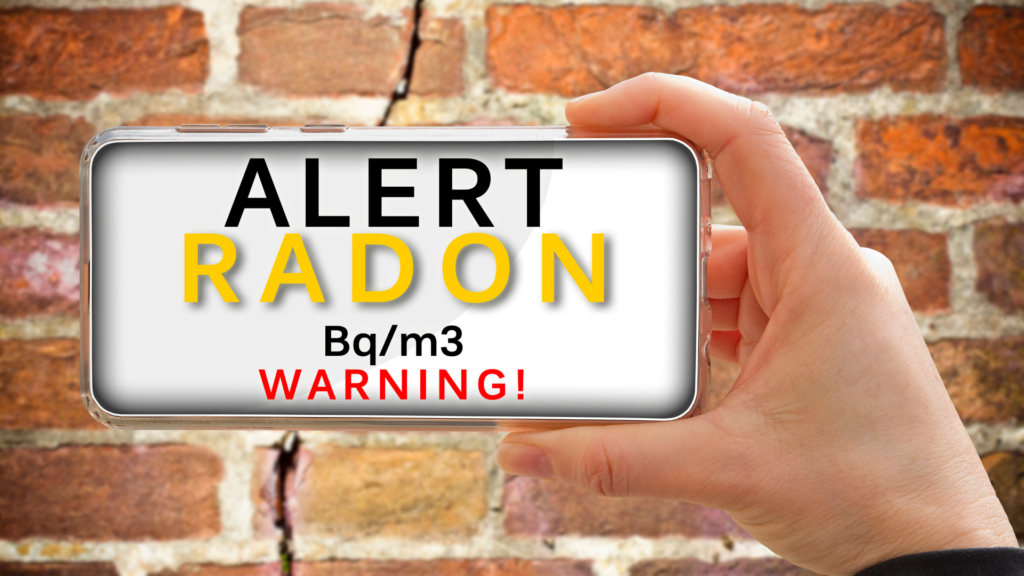
Radon gas, a radioactive gas, is a leading cause of lung cancer among non-smokers. It poses a significant health risk, and testing for radon levels is crucial to determine if your home is affected. The Environmental Protection Agency (EPA) recommends mitigation if radon levels exceed the national average of 4 pCi/L. Mitigation involves installing a system that reduces radon levels in your home, thereby protecting lung health and improving overall air quality. It’s good news that organizations like the American Lung Association work to raise awareness about radon and promote clean air initiatives. Testing and mitigating radon is especially important in Rhode Island, where real estate regulations require radon testing during home sales. Don’t ignore the danger posed by radon; take the necessary steps to ensure the safety of your home and your loved ones’ health.
The Danger of Radon Gas in Homes
Radon gas poses a serious threat to homes, yet it cannot be detected by our senses. This odorless, colorless gas seeps into our living spaces through cracks, gaps, and openings in the foundation, crawl space, or basement. The long-term exposure to high levels of radon gas significantly increases the risk of developing lung cancer. In fact, radon gas is the second leading cause of lung cancer, responsible for around 21,000 deaths in the United States each year. To protect ourselves and our loved ones, it’s crucial to test for radon gas, especially in geographic locations with elevated radon levels. Organizations like the American Lung Association actively promote testing and advocate for clean air and lung health.
Importance of Radon Detection and Mitigation
Radon detection and mitigation play a crucial role in maintaining healthy indoor air quality. Testing for radon is essential as it helps homeowners determine the amount of radon gas present in their homes. By analyzing the test results, homeowners can make informed decisions about whether mitigation is necessary. Factors such as home size, foundation type, and geographic location can influence the cost of radon mitigation systems. These systems work by creating suction to remove radon gas and prevent it from entering the home. It’s important to note that radon mitigation system installation should be done by a professional to ensure proper functioning and effectiveness in reducing radon levels. By addressing radon gas, homeowners can create a safer and healthier living environment.
Radon Air System Installation: DIY Approach
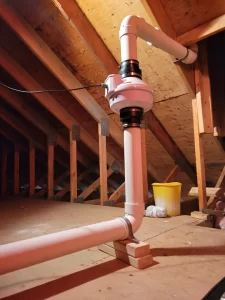
When it comes to radon air system installation, taking the DIY approach can be a cost-effective option. However, it’s important to have the necessary equipment and knowledge to ensure proper installation. Testing radon levels can be done using radon test kits available at home improvement stores. If you decide to install a radon air system yourself, there are specific steps to follow, such as sealing foundation cracks and installing PVC pipe. Keep in mind that DIY installation may come with challenges, like accessing crawl spaces or unfinished basements. Before attempting DIY radon mitigation, it’s crucial to consult the EPA guidelines and local regulations.
Necessary Equipment for DIY Installation
To successfully install a radon air system yourself, you’ll need to gather the necessary equipment. This includes radon test kits, sealing materials, PVC pipe, and a suction fan. The first step is to use a radon test kit to determine the levels of radon in your home. Once you have the results, you can proceed with sealing any foundation cracks using caulk or other suitable sealing materials. Next, you’ll need to install PVC pipe to create the radon air system, which will direct the radon gas out of your home. Finally, a suction fan is crucial for creating the necessary suction to remove the radon gas effectively.

Steps for Installing a Radon Air System Yourself
When it comes to installing a radon air system yourself, there are several important steps to follow. The first step is testing the radon levels in your home using a test kit. This will help you determine if you need to take further action. Once you have determined the radon levels, the next step is sealing foundation cracks and openings to prevent radon gas entry. This is an important step to ensure that the system works effectively. The third step involves installing PVC pipe, which will lead the radon gas from the foundation to the outside of the home. This is where a suction fan comes into play. It creates the necessary suction to pull the radon gas out of the home. Finally, ongoing testing and monitoring of radon levels are essential even after the installation is complete. This will ensure that the radon air system continues to work effectively and keep your home safe.
Challenges You Might Encounter During DIY Installation
During DIY radon air system installation, there are several challenges that you might encounter. Accessing the crawl space or unfinished basements can be difficult, requiring some physical maneuvering. Additionally, finding and sealing all foundation cracks and openings requires thorough inspection and attention to detail. Proper installation of the PVC pipe system, including locating the suction fan correctly, can be challenging without professional guidance. Moreover, it is essential to note that DIY radon air system installation may not be suitable for homes with high levels of radon gas, necessitating professional mitigation. Lastly, regular testing and monitoring of radon levels are vital to ensure the effectiveness of the DIY radon air system.
DIY vs. Professional Installation: Assessing the Costs
Assessing the costs of DIY vs. professional installation is crucial when considering a radon air system. While DIY installation may initially appear cost-effective, it’s important to be aware of hidden costs that can arise during the process. Additionally, DIY installation often requires the purchase of specialized tools, further adding to the overall expenses. On the other hand, professional installation may have a higher upfront cost but ensures the work is done correctly. This includes the cost of labor, materials, and any necessary permits. It’s essential to consider the potential health risks associated with radon exposure when assessing the cost of installation. A compromise between cost-effectiveness and peace of mind can be achieved by consulting with professionals and obtaining accurate estimates.
Making an Informed Decision: DIY or Professional Installation?
Considering the level of radon exposure, health risks, and lung cancer risk associated with radon gas, homeowners should evaluate their expertise, budget, time commitment, and prioritize the health and safety of occupants when deciding between DIY or professional installation.

Is DIY Radon Air System Installation Worth the Risk?
Considering the risks involved, DIY radon air system installation might not be worth it. Inexperienced homeowners may lack the necessary knowledge and skills, leading to ineffective mitigation. Professional installation ensures the health and safety of occupants, making it a better investment.
Conclusion
In conclusion, when it comes to installing a radon air system in your home, you have two options: DIY or professional installation. While the DIY approach may seem more cost-effective initially, it is important to consider the potential challenges and risks involved. A professional installation offers numerous benefits, including expertise, guaranteed results, and peace of mind. By hiring a reliable radon mitigation service provider, such as [company name], you can ensure that your home is safe from the dangers of radon gas. Contact us today or visit our website to schedule a consultation and assessment of your home’s radon levels. It is crucial to assess the costs and weigh the pros and cons before making a decision. Ultimately, the health and safety of your family should be the top priority.